Event creation tutorial
This guide provides step-by-step instructions and accompanying screenshots to explain the process of setting up and launching your event on the platform in less than 2 minutes.
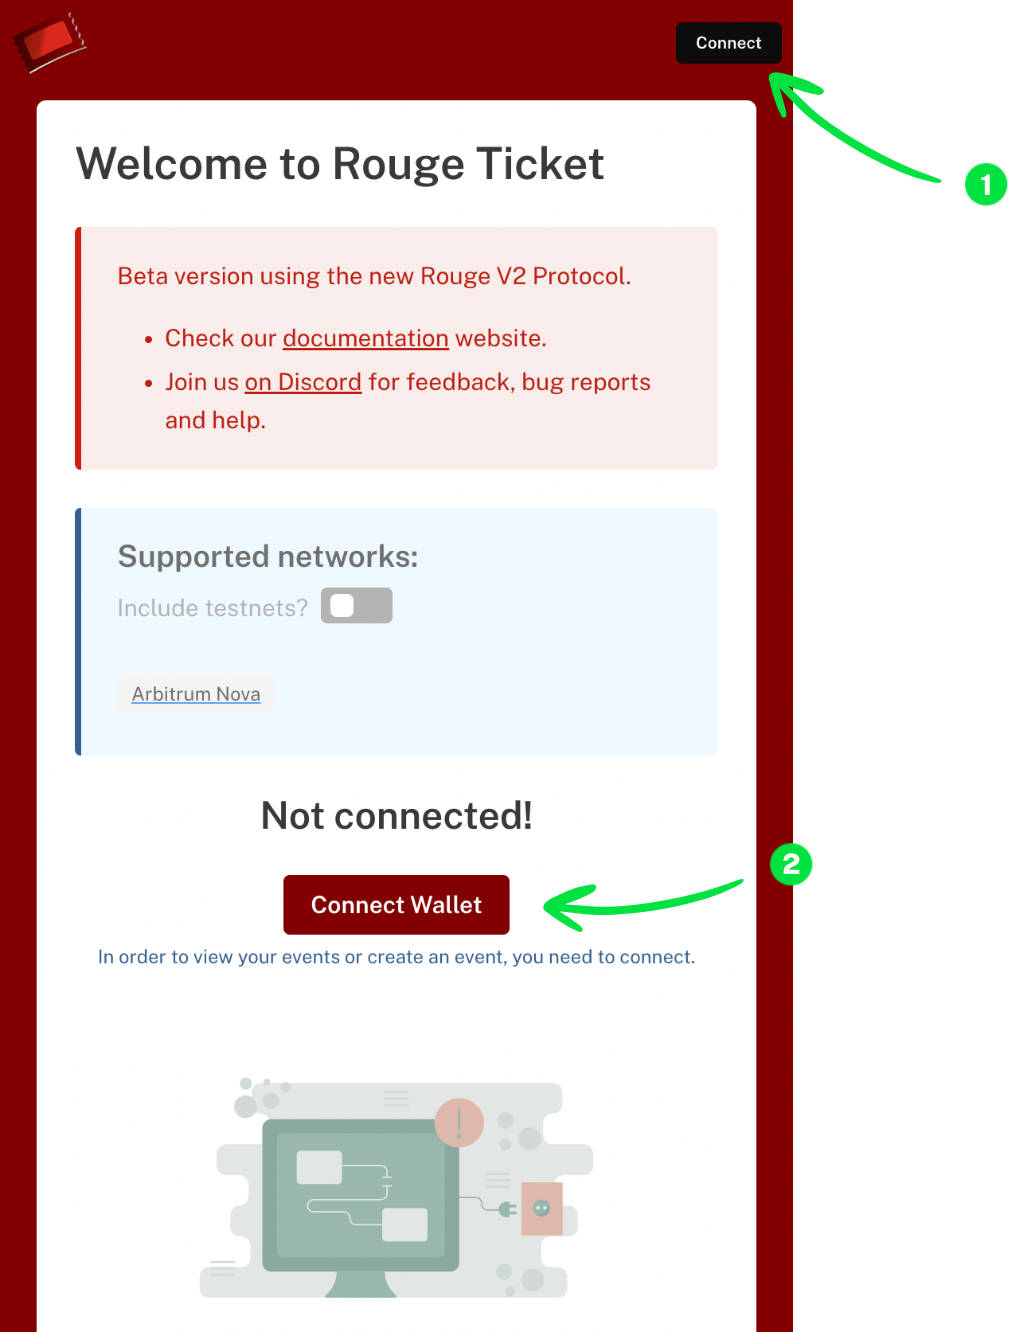
Connect Wallet
Begin by connecting your EVM wallet to the Rouge Ticket app. Two 'Connect' buttons are available, one at the top right and another in the center of the screen.
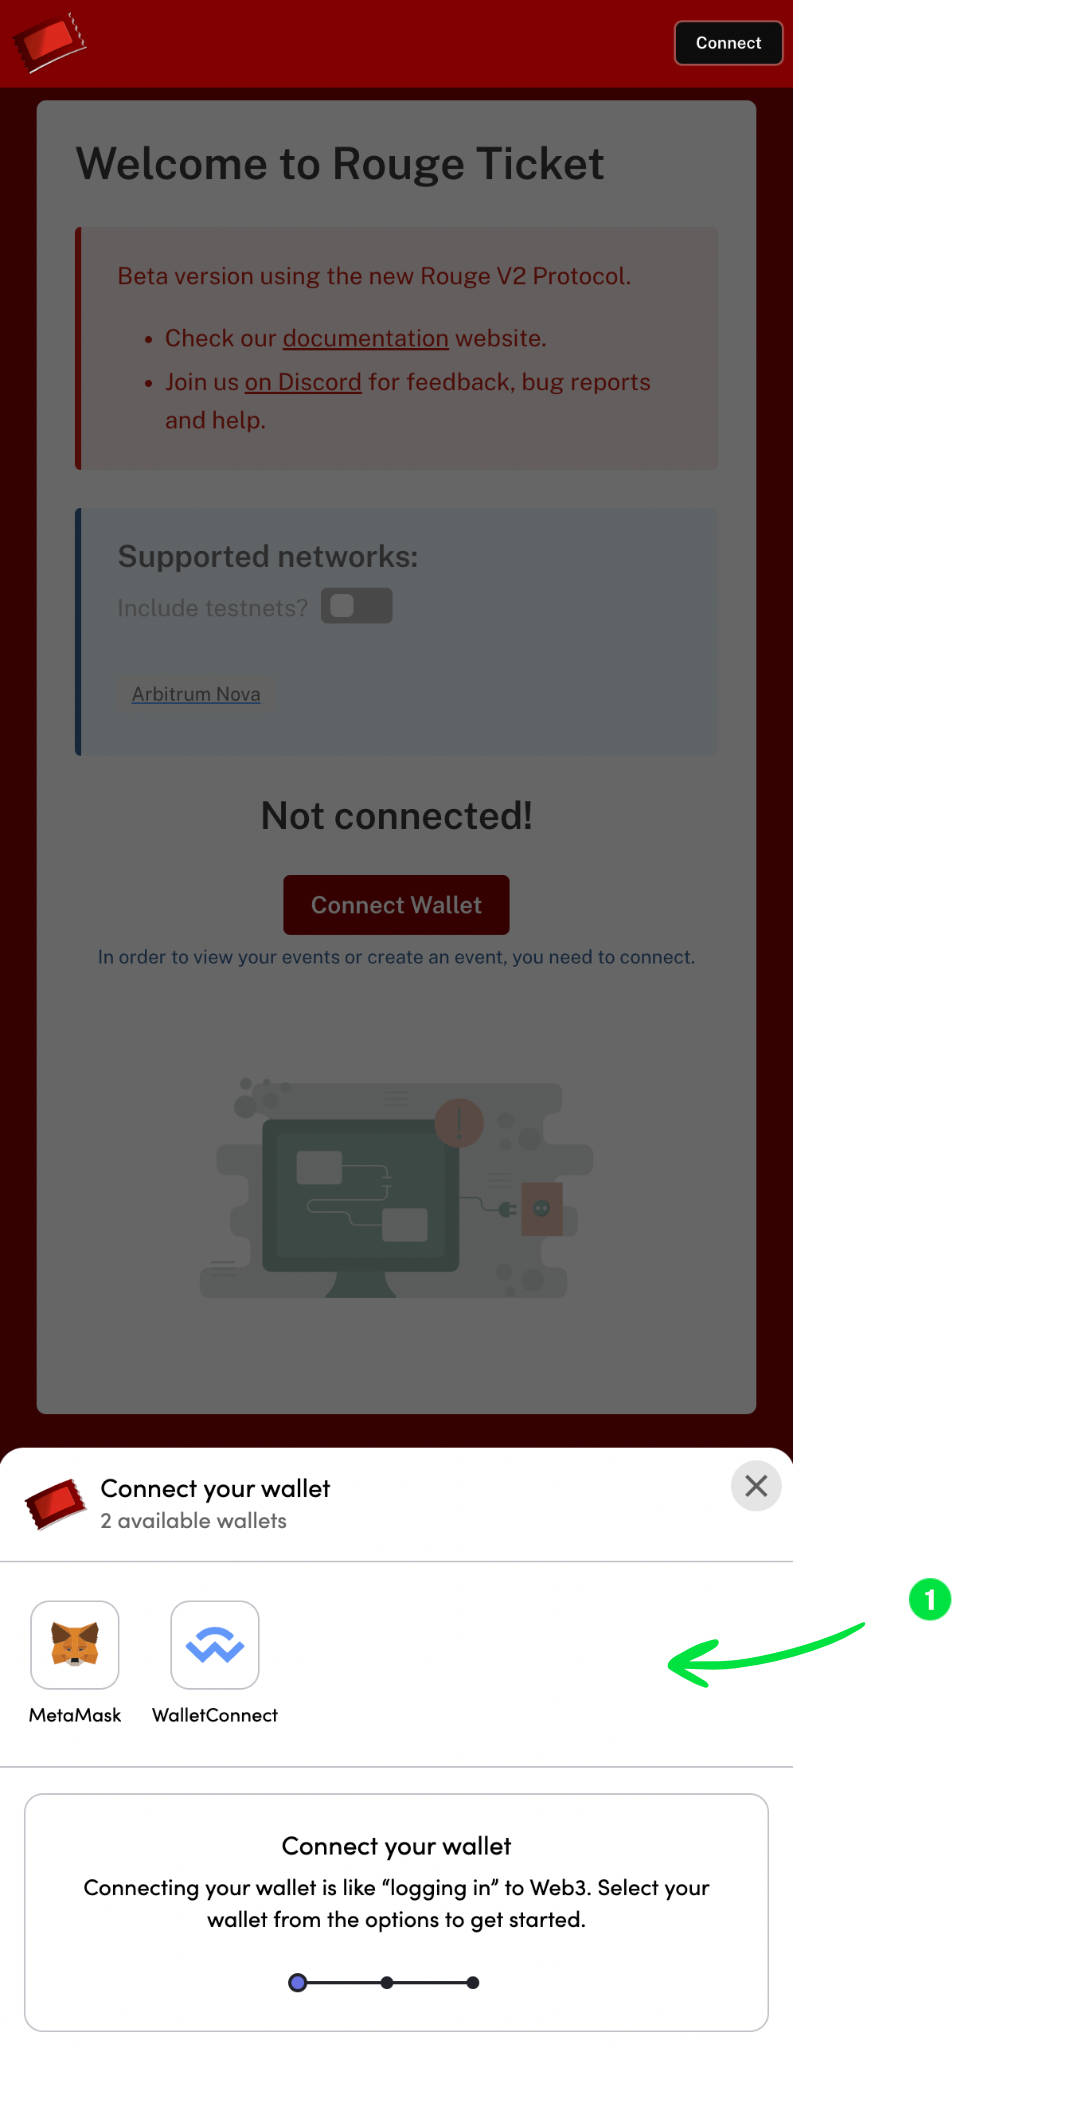
Wallet Options
A modal window appears, offering wallet options such as MetaMask or WalletConnect. Select your preferred wallet.
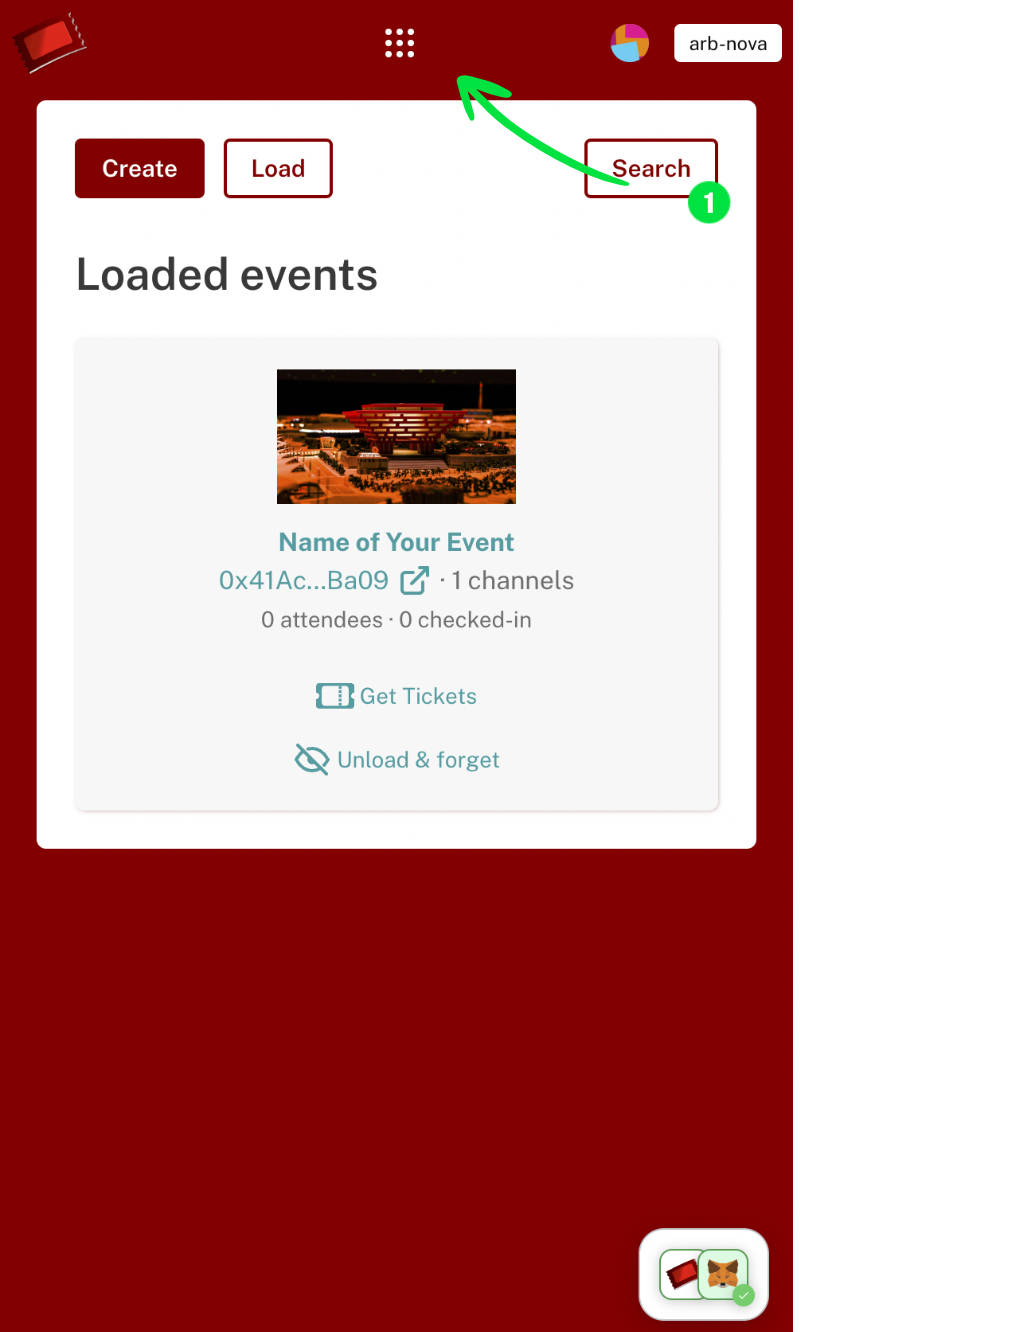
Connected Home
Once connected, the current chain is visible at the top right corner. To create a new event, click on the red 'Create' button. The center top grid menu allows you to switch between the event manager and ticket book or disconnect your wallet.
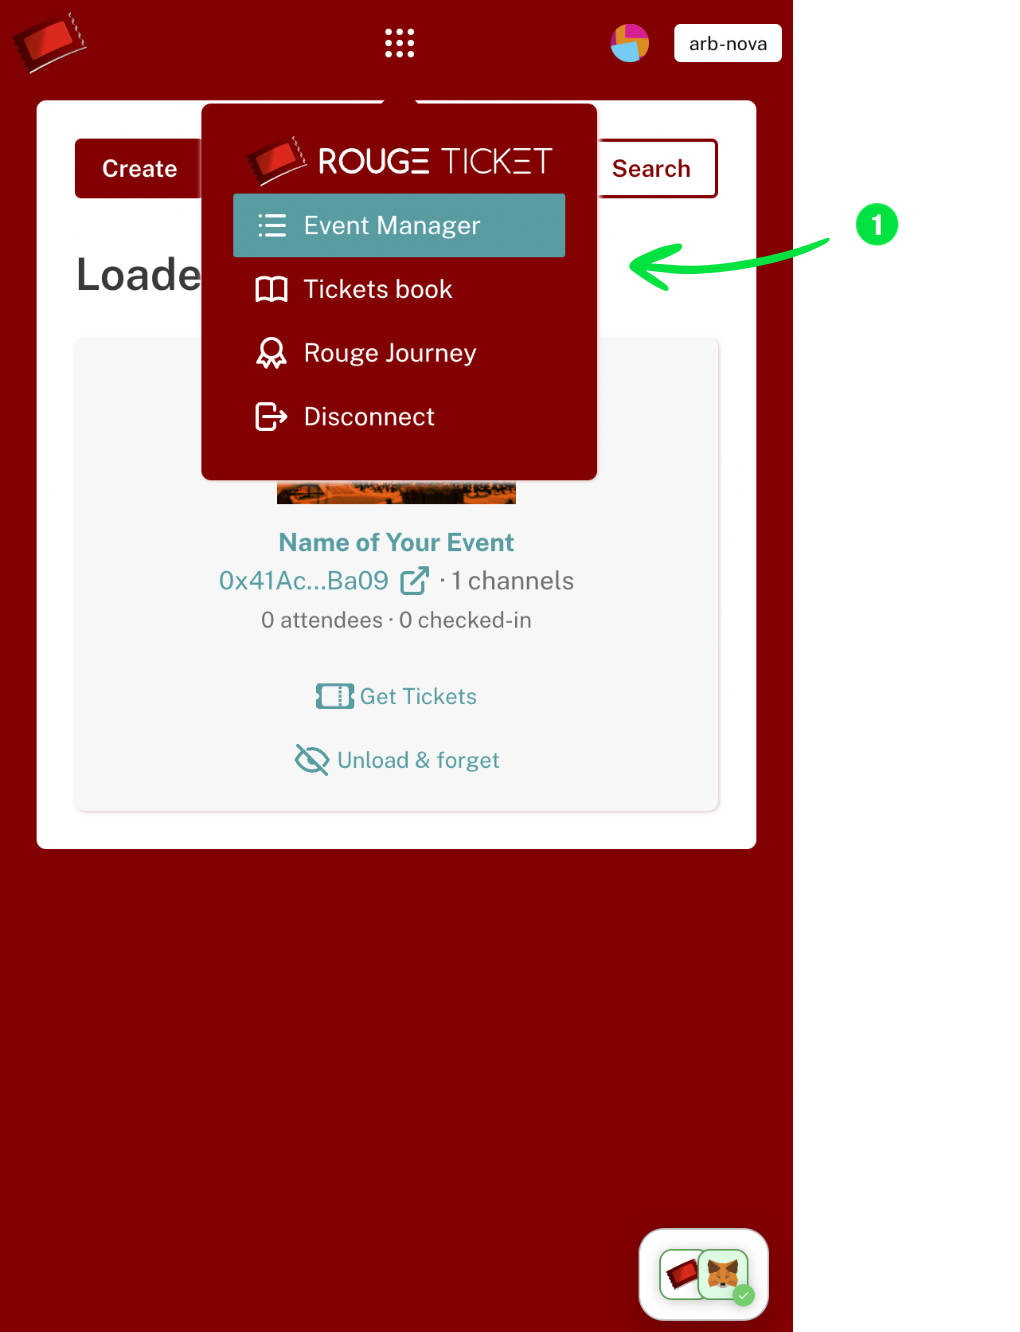
Grid Menu
The grid menu is deployed, showing the active event manager.
Event Form (Top)
Click on the 'Create' button to open the event creation form. Enter the event's start and end date and time, name, and select a category.

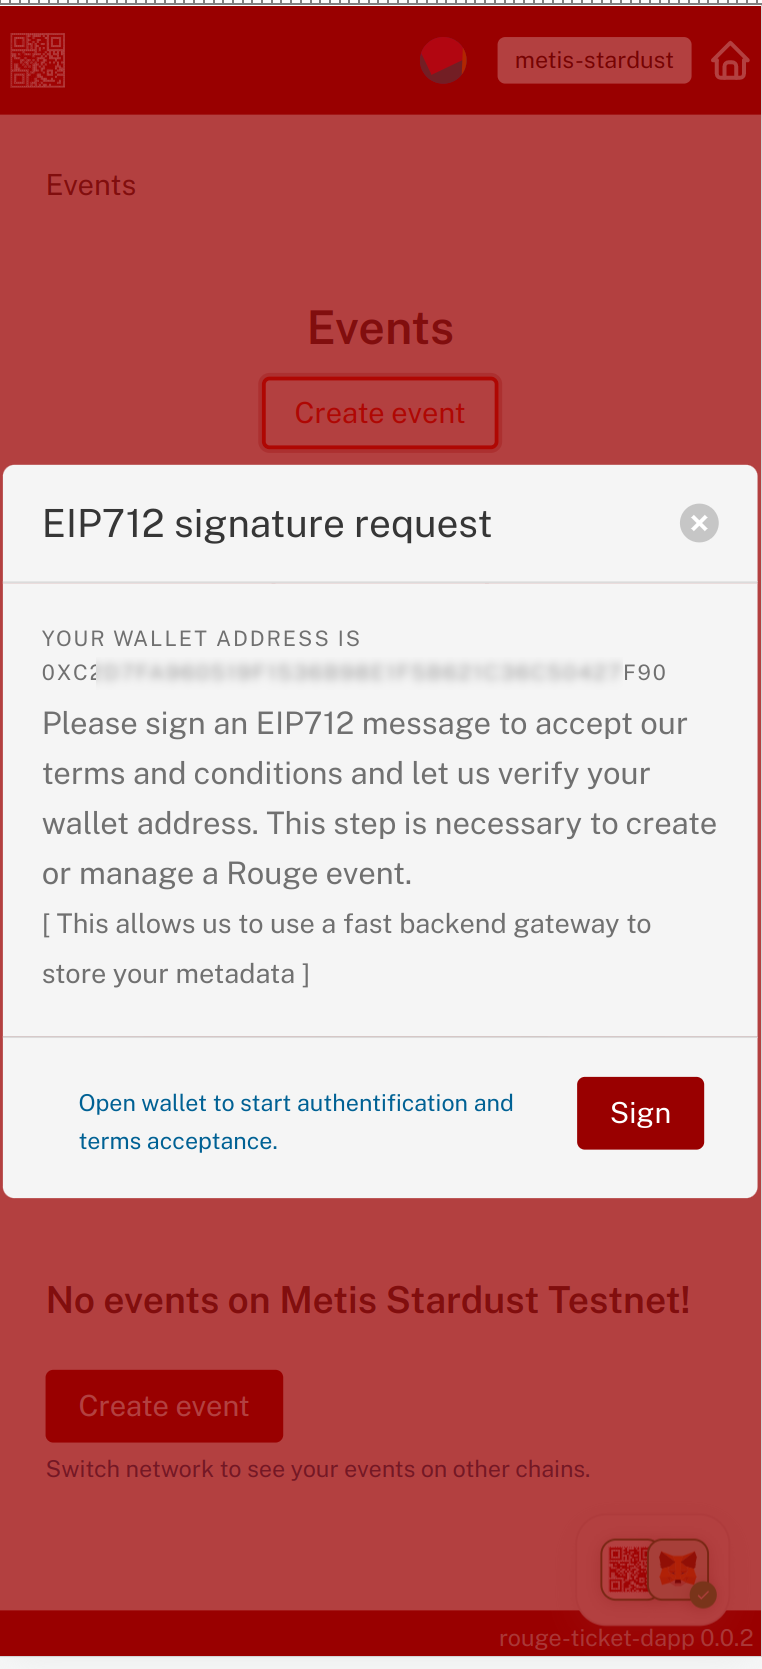
Signature
The first time you will create an event, you have to authenticate your wallet address using an EIP712 signature.
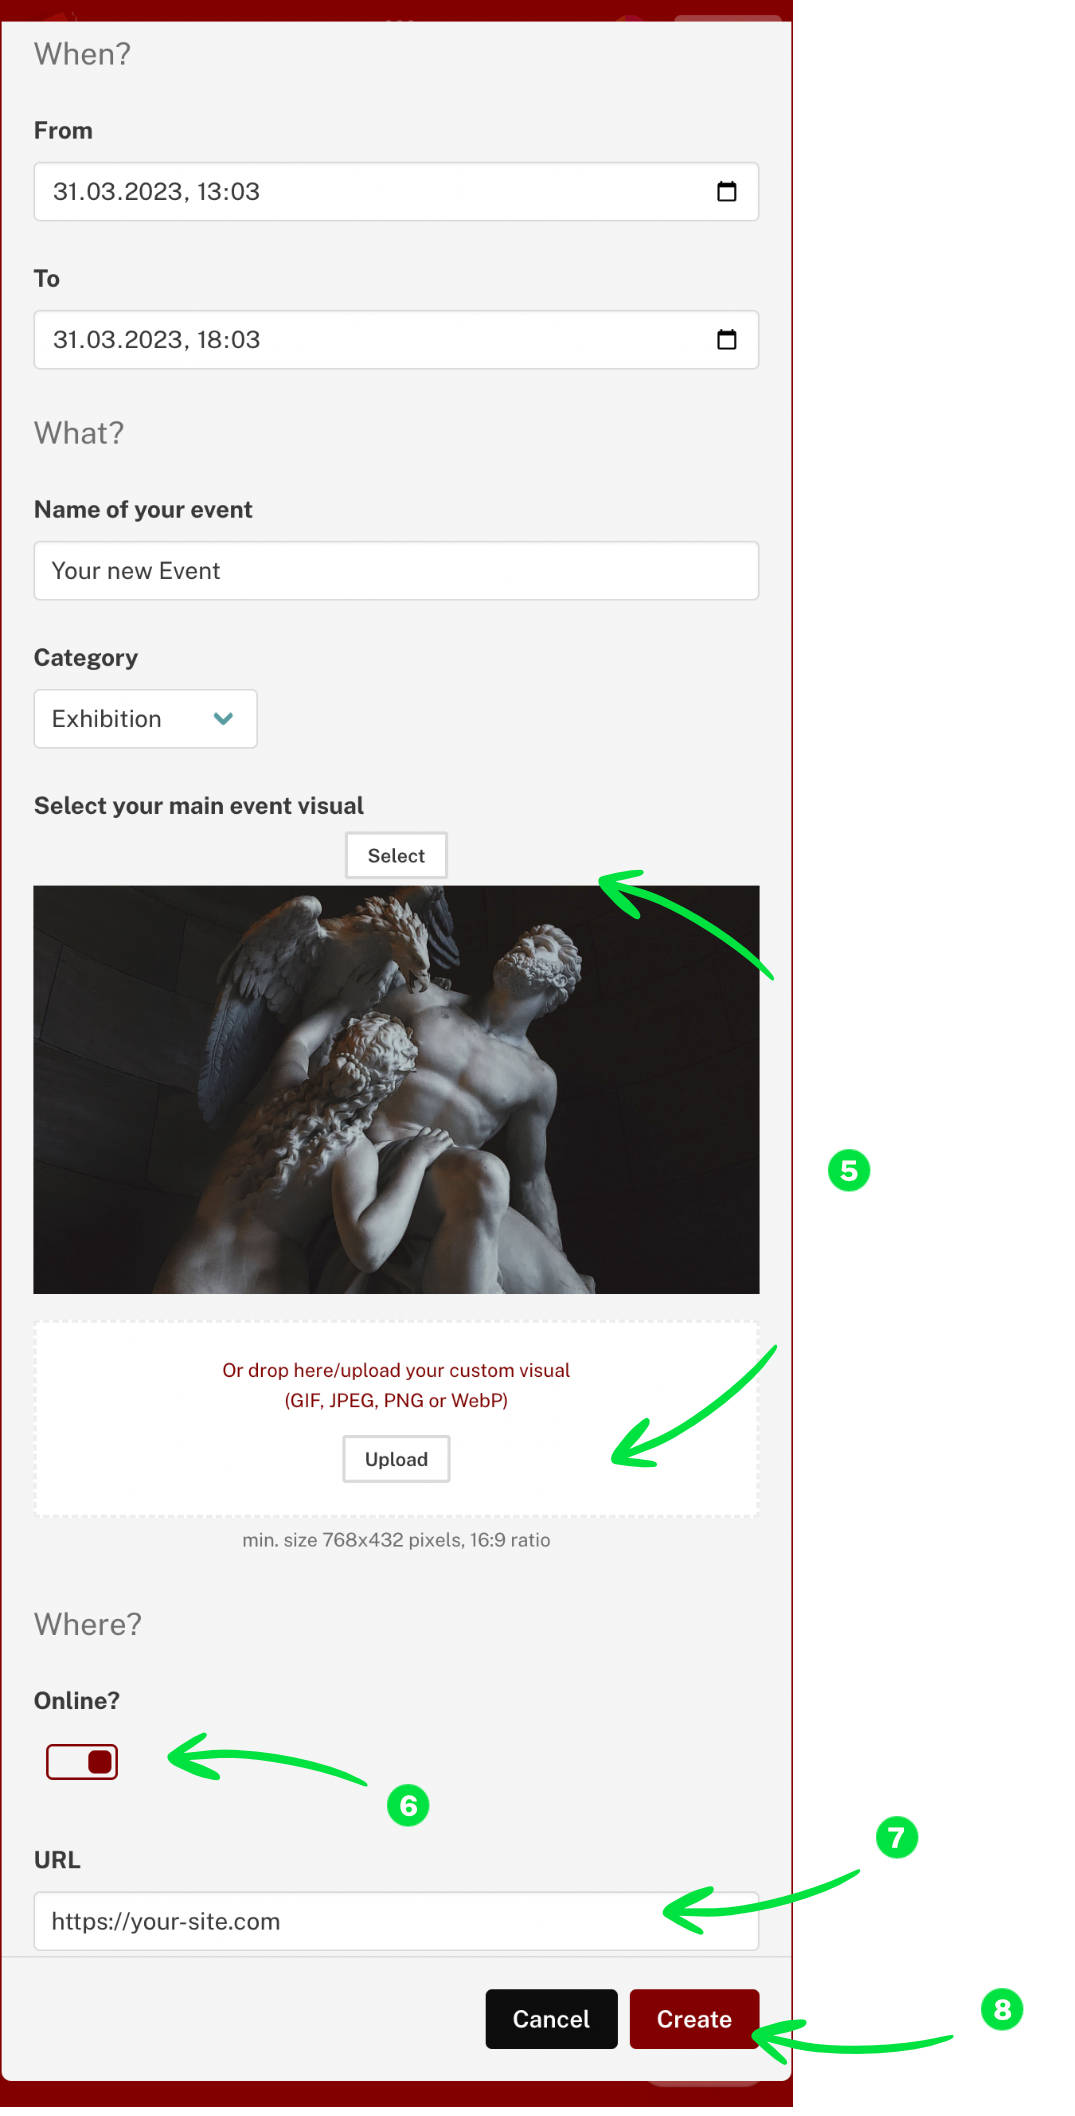
Event Form (Bottom)
Further customize your event by selecting the main event visual, choosing from default options or uploading your own image. Indicate if the event is online by checking the 'Online' box, and enter the event URL if applicable. Click 'Create' to proceed.
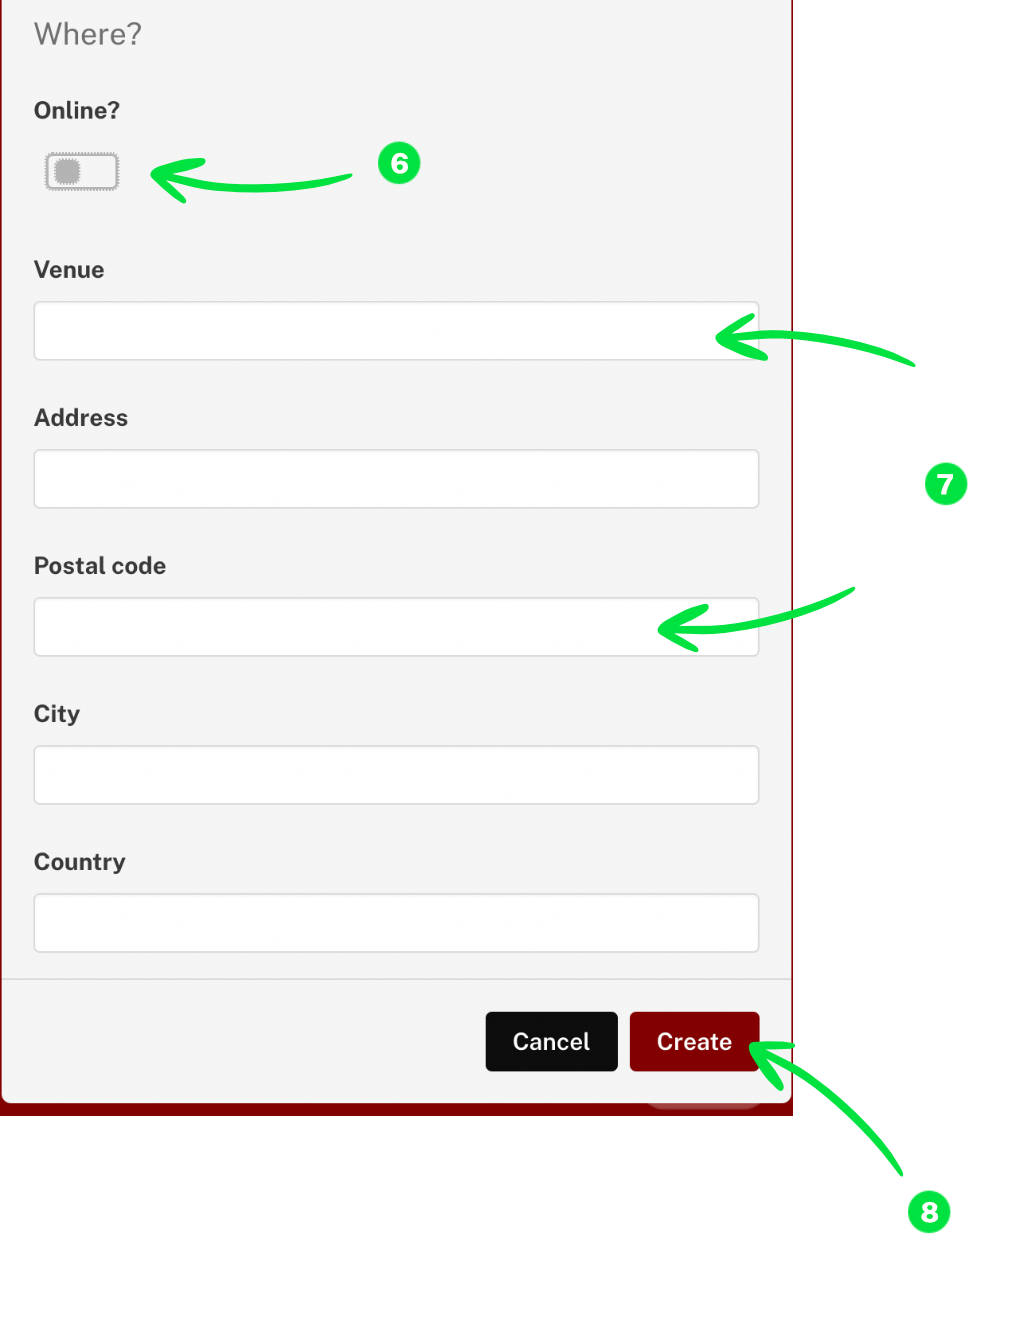
Offline Event
If the 'Online' box is unchecked, provide venue details such as the venue name, address, postal code, and city. Click 'Create' to continue.
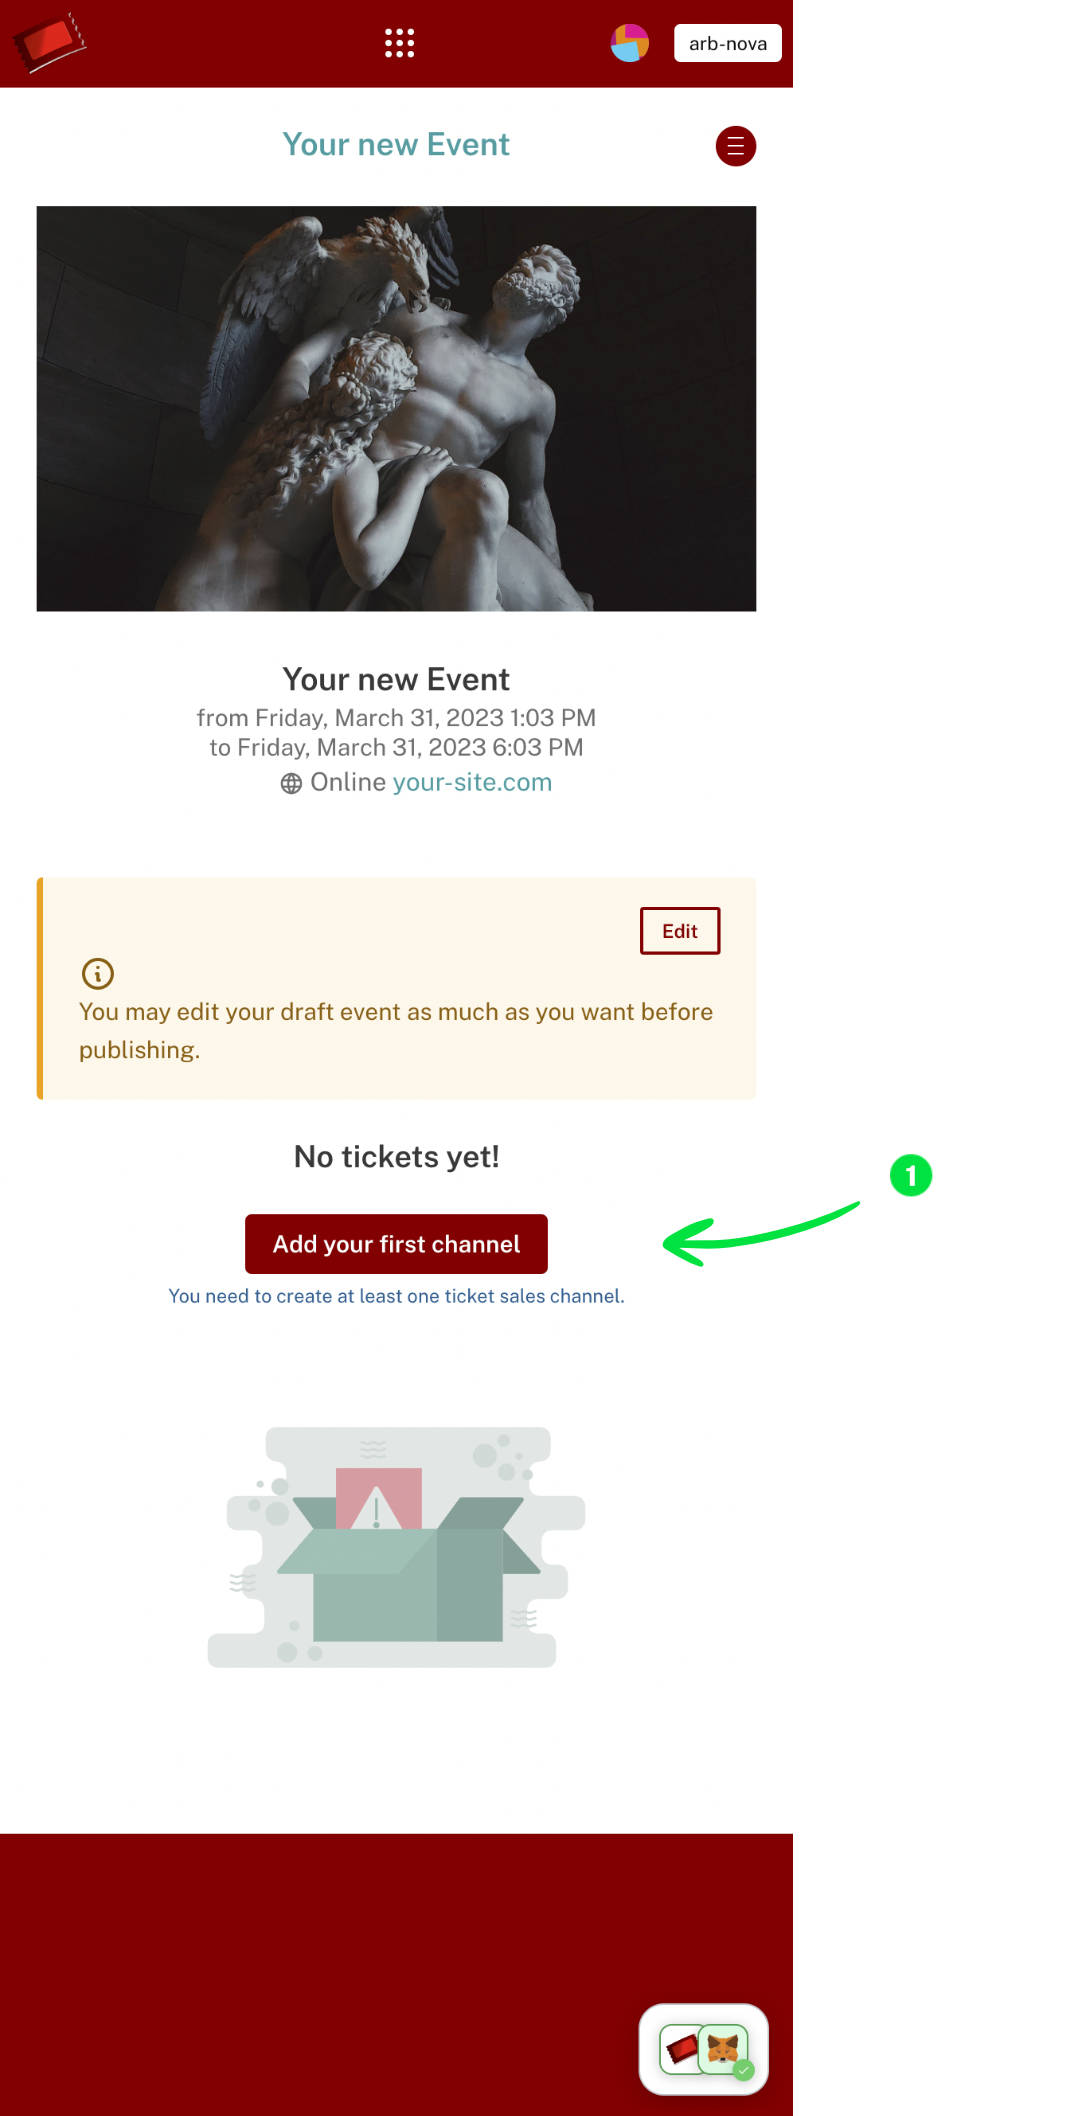
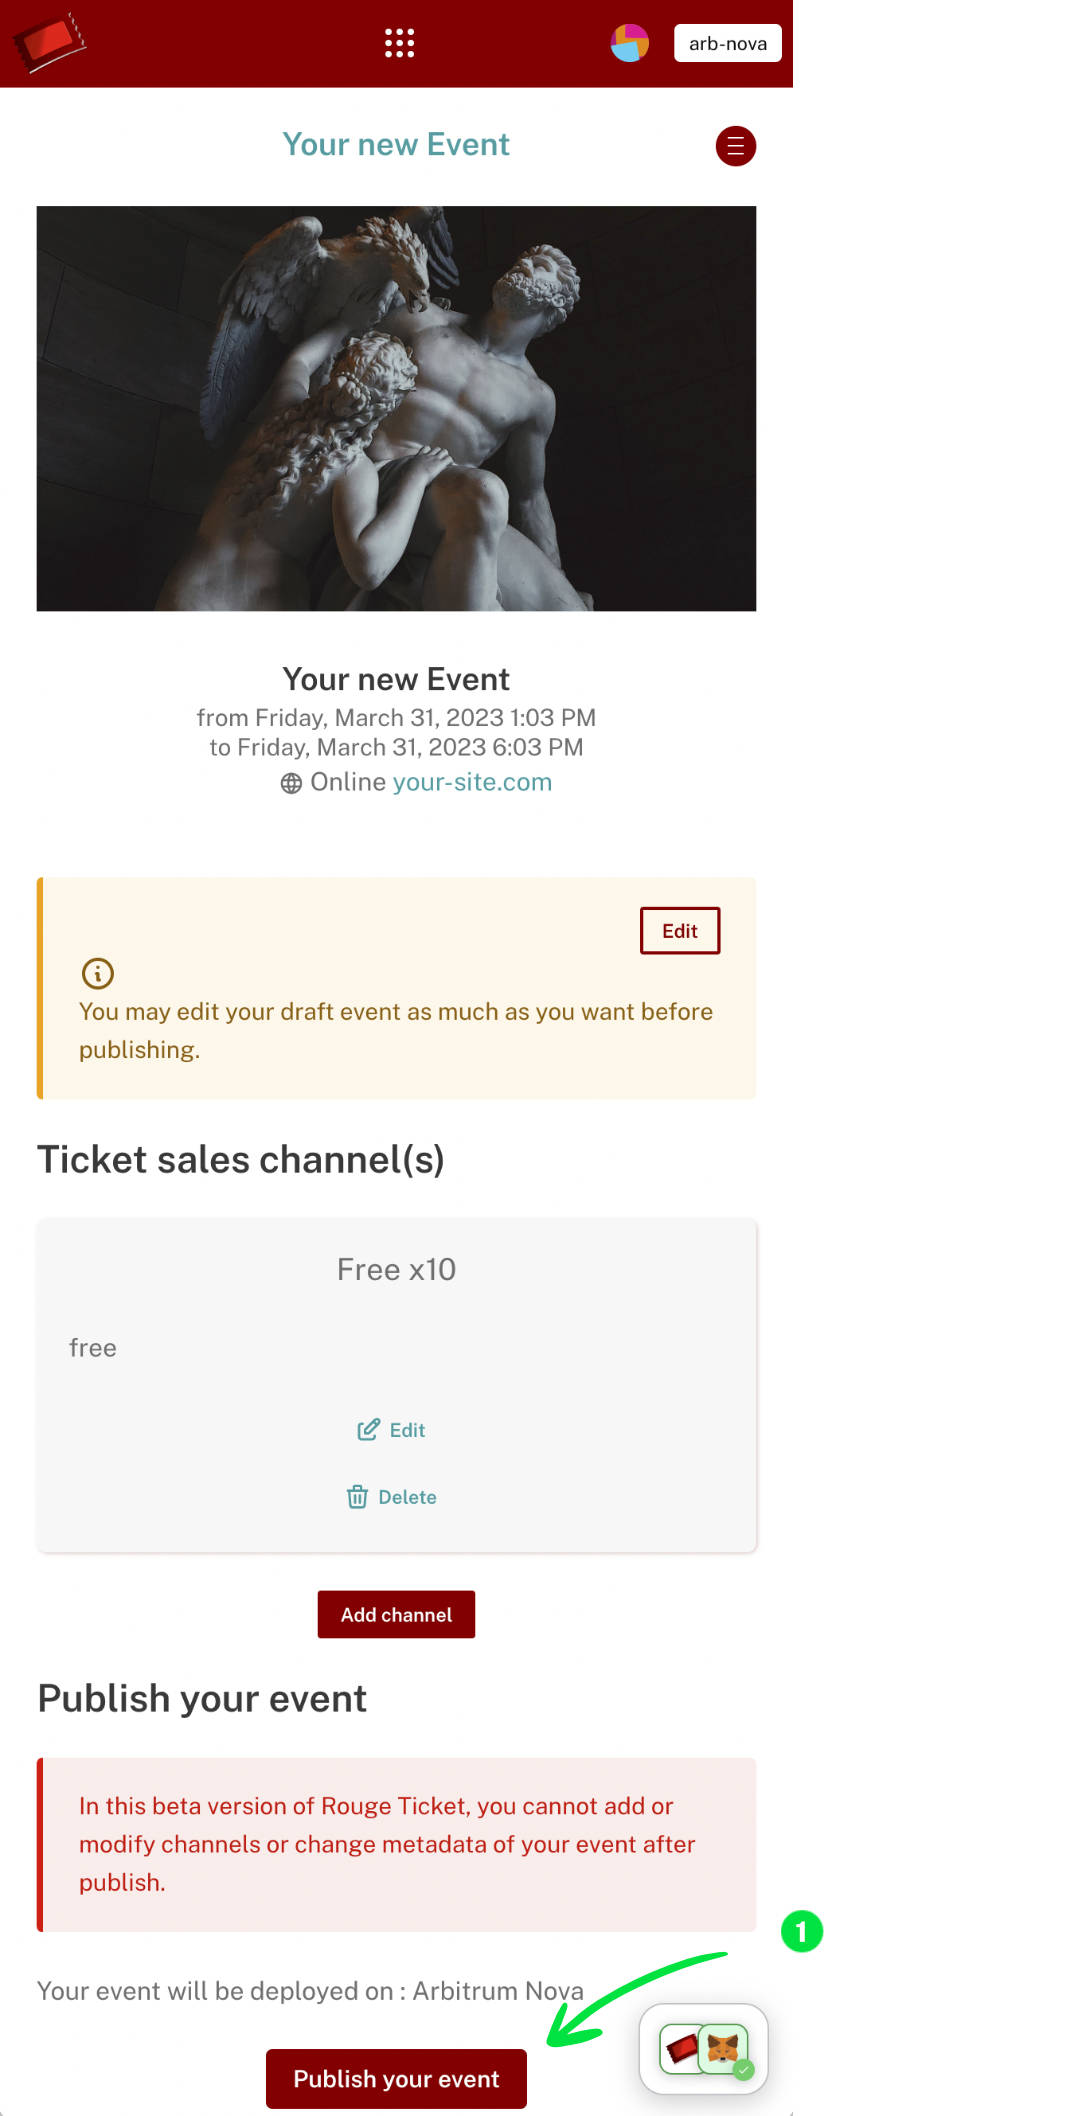
Draft Event Dashboard
On the draft event dashboard, click 'Add your first channel' to proceed.
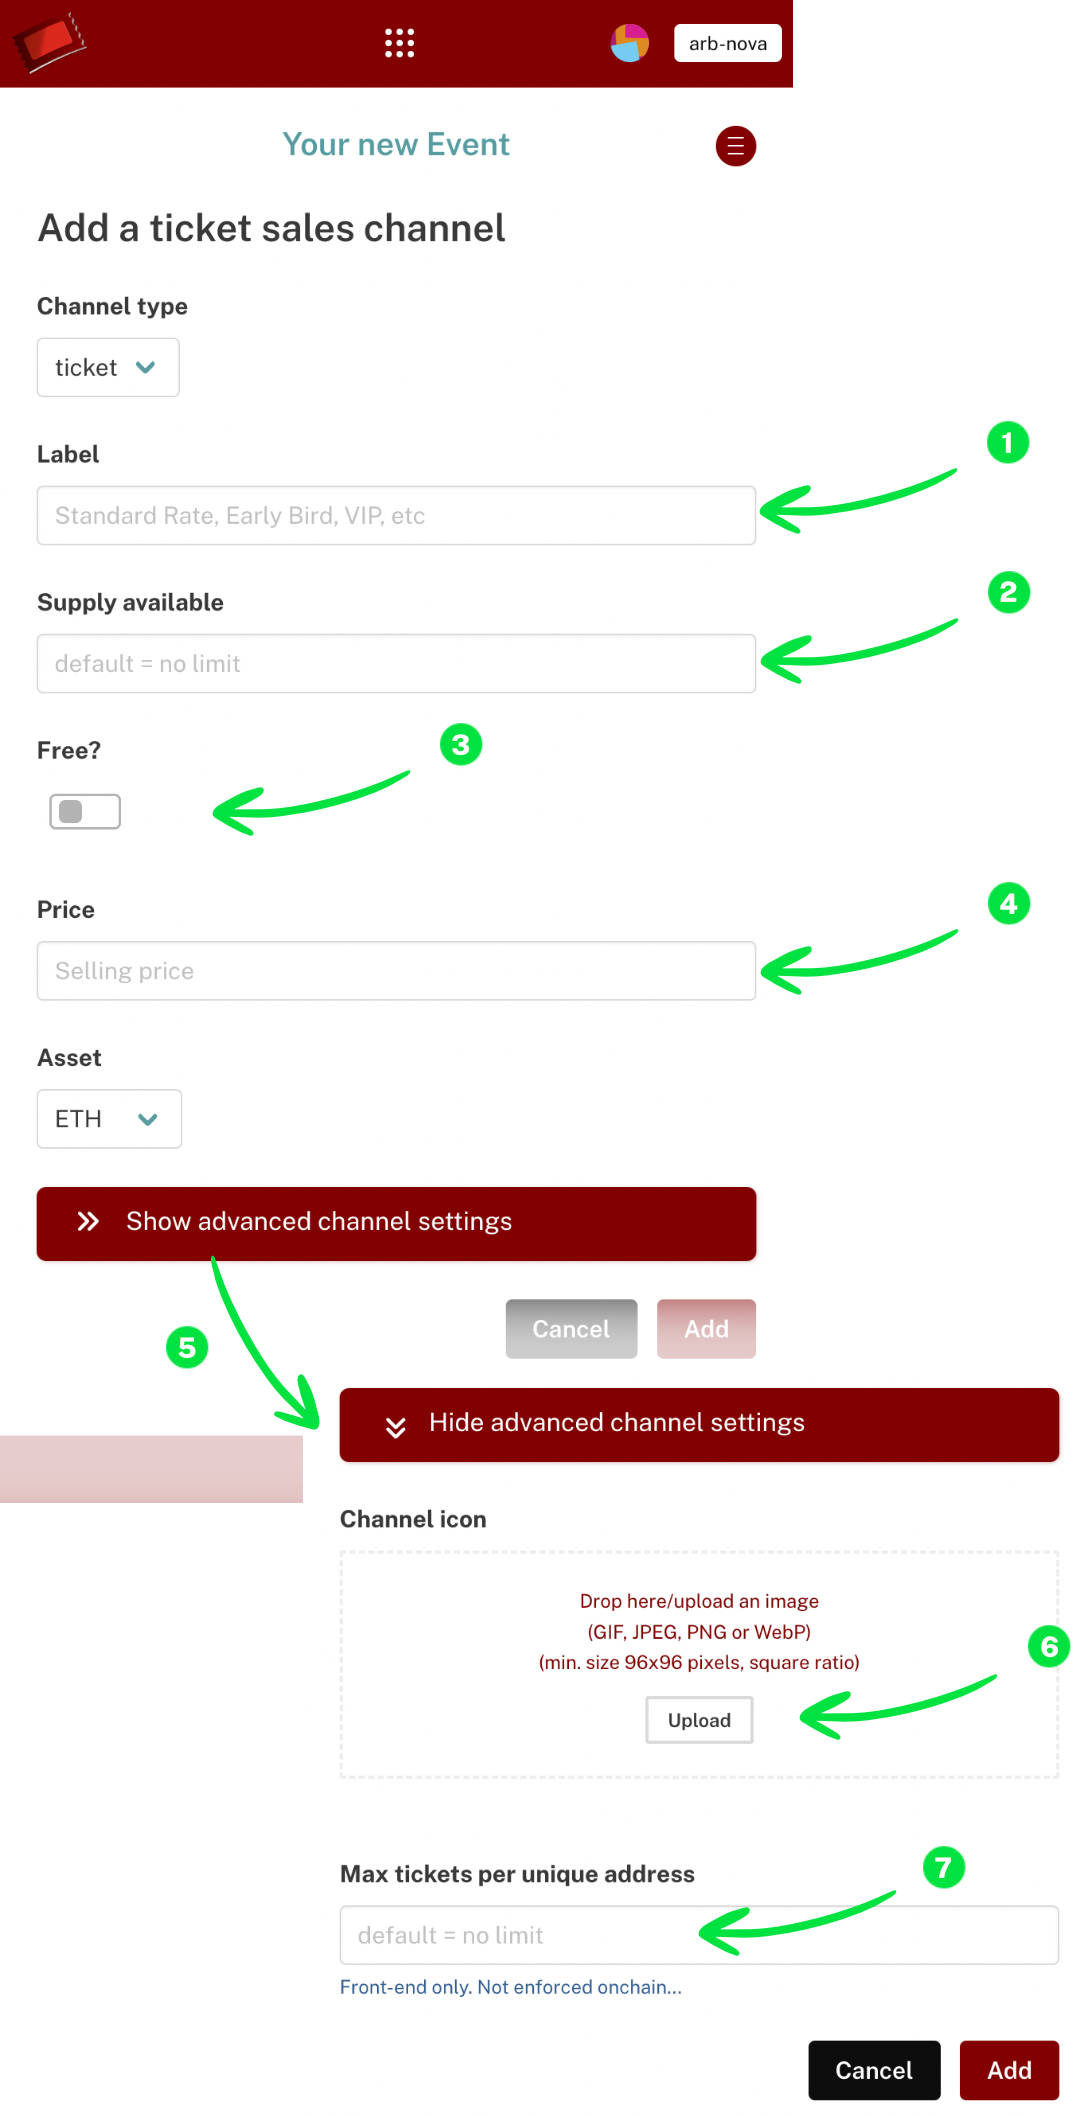
Channel Configuration
In the channel creation form, enter a label, supply, and price (if not free). Access advanced settings by clicking on the accordion, where you can upload a channel icon and set a maximum ticket limit per unique address.
Channel Added
Return to the event dashboard, where the created channel is now displayed. Click 'Publish your event' to make it public.
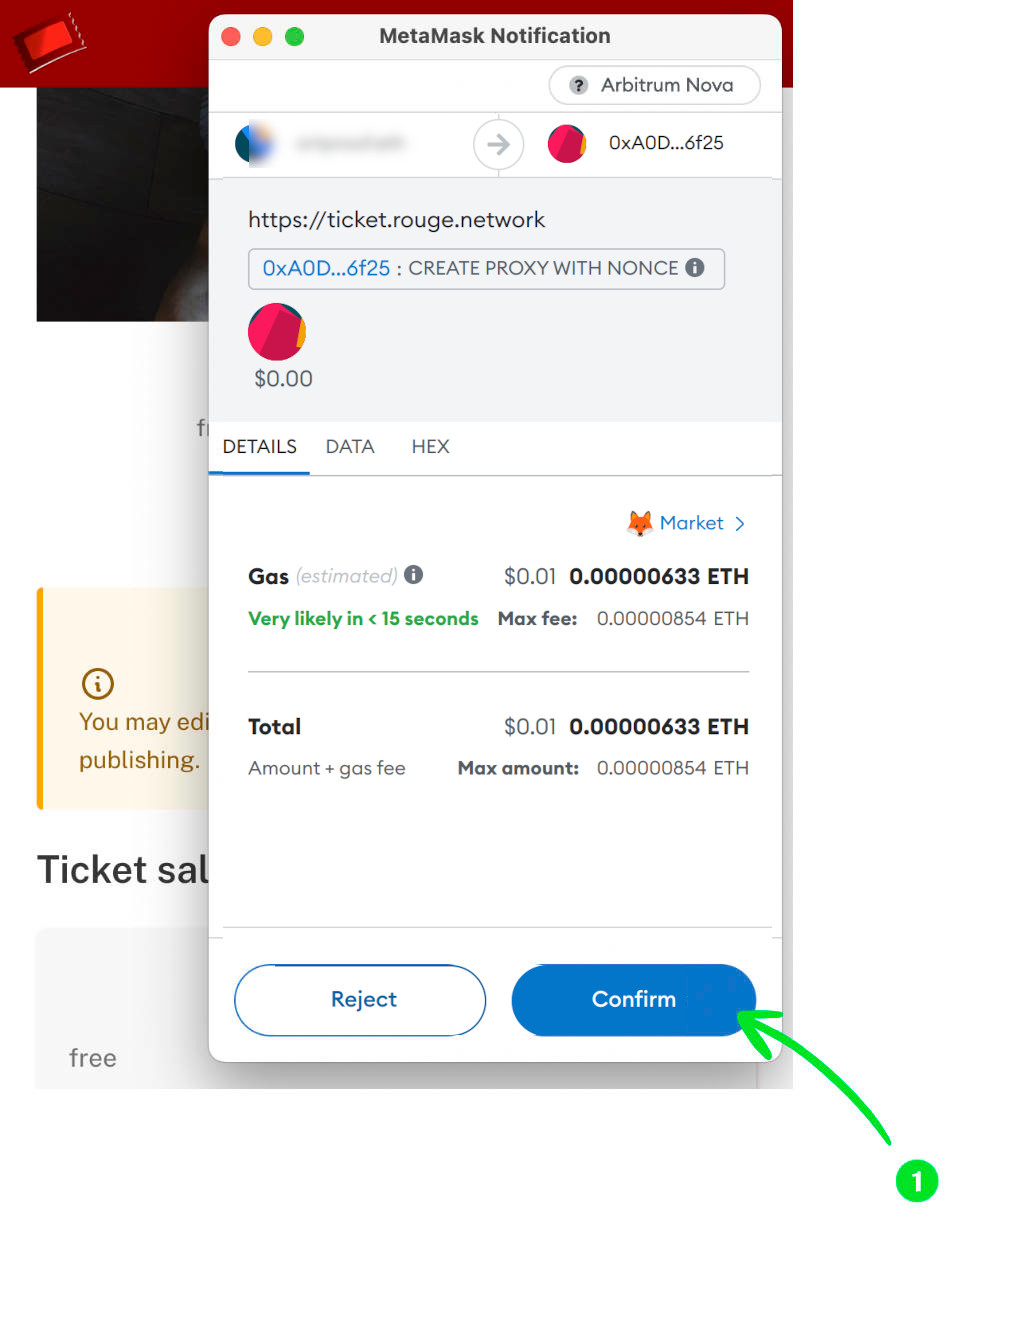
Confirm Transaction
Upon clicking 'Publish,' confirm the transaction in your MetaMask popup by clicking 'Confirm.'
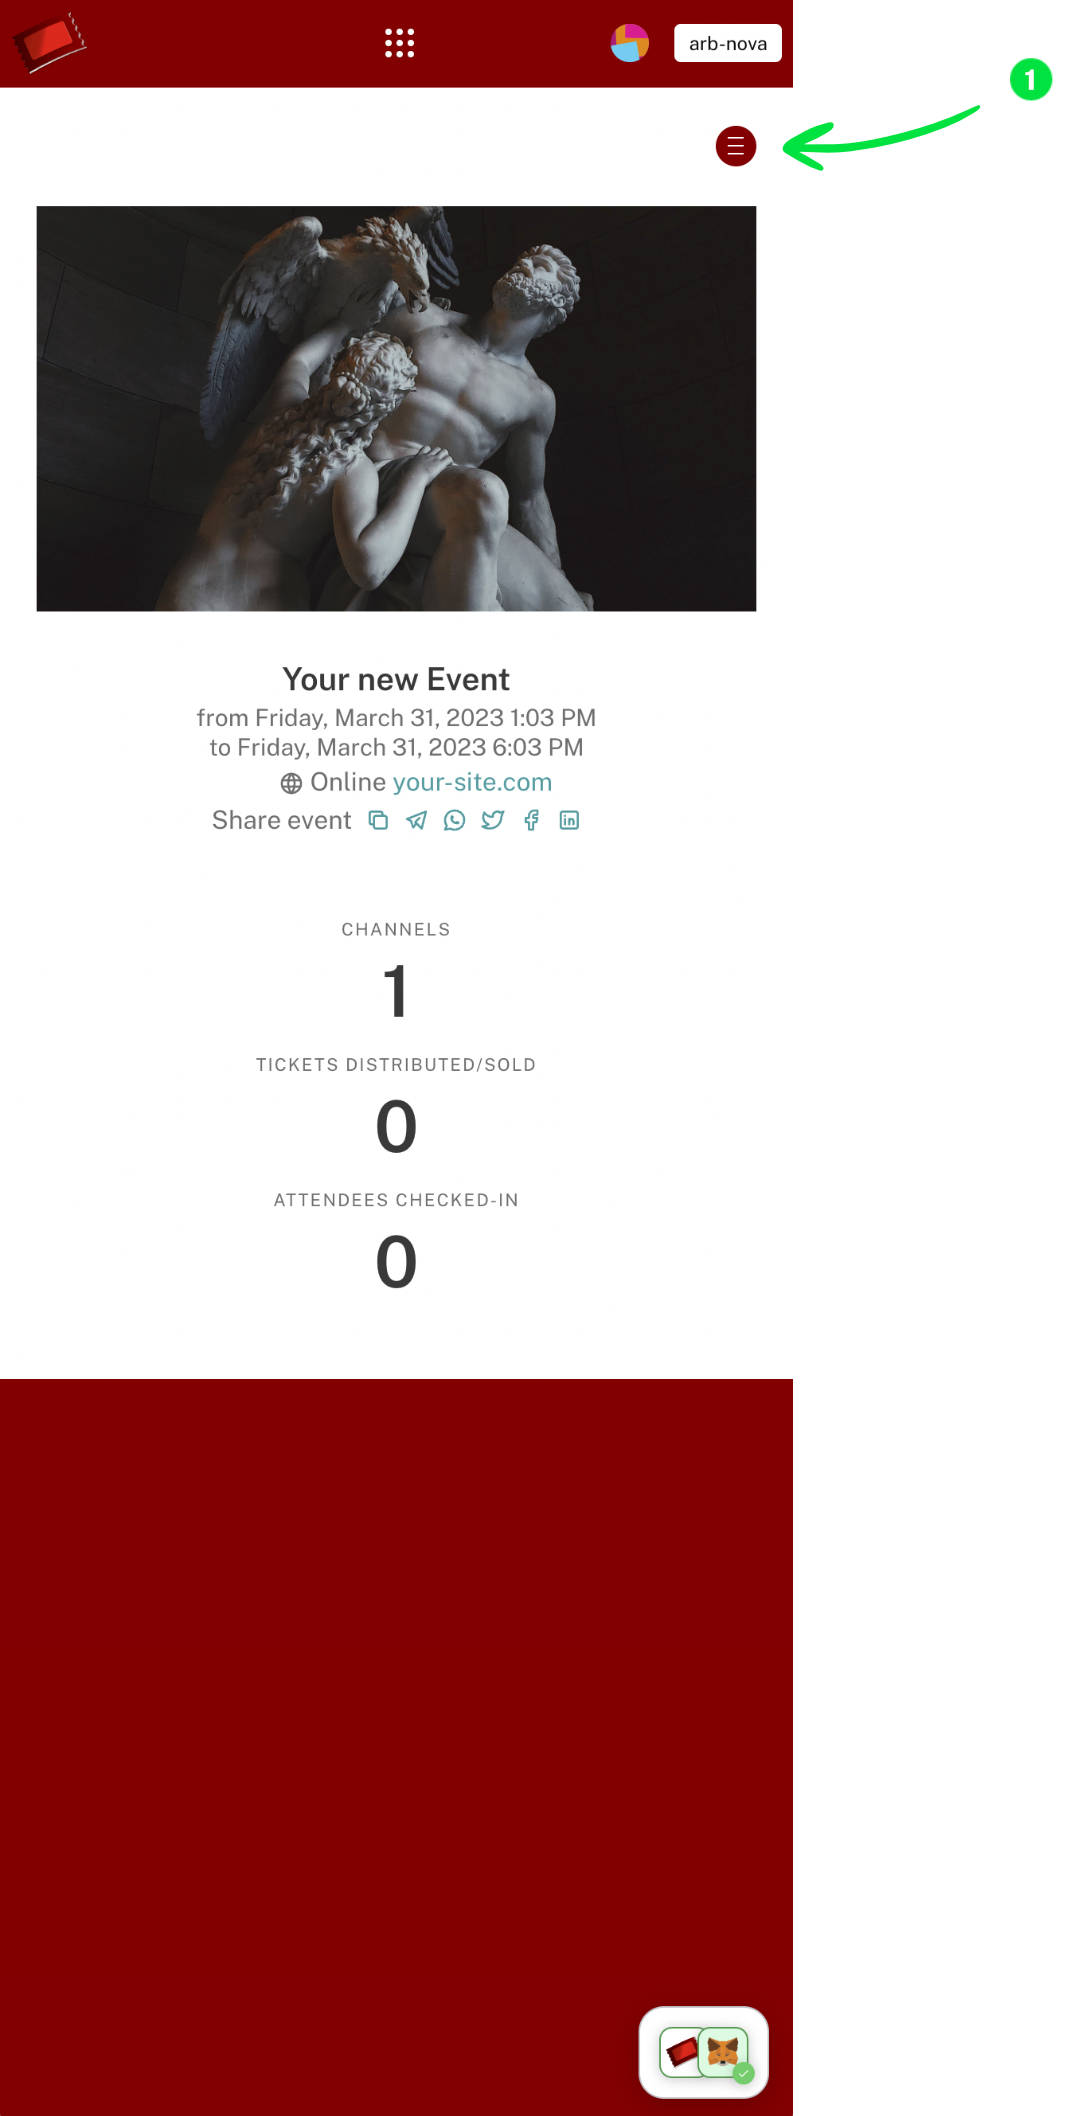
Published Event Dashboard
Once the transaction is confirmed, the published event dashboard is displayed. The top-right event submenu icon provides additional options.
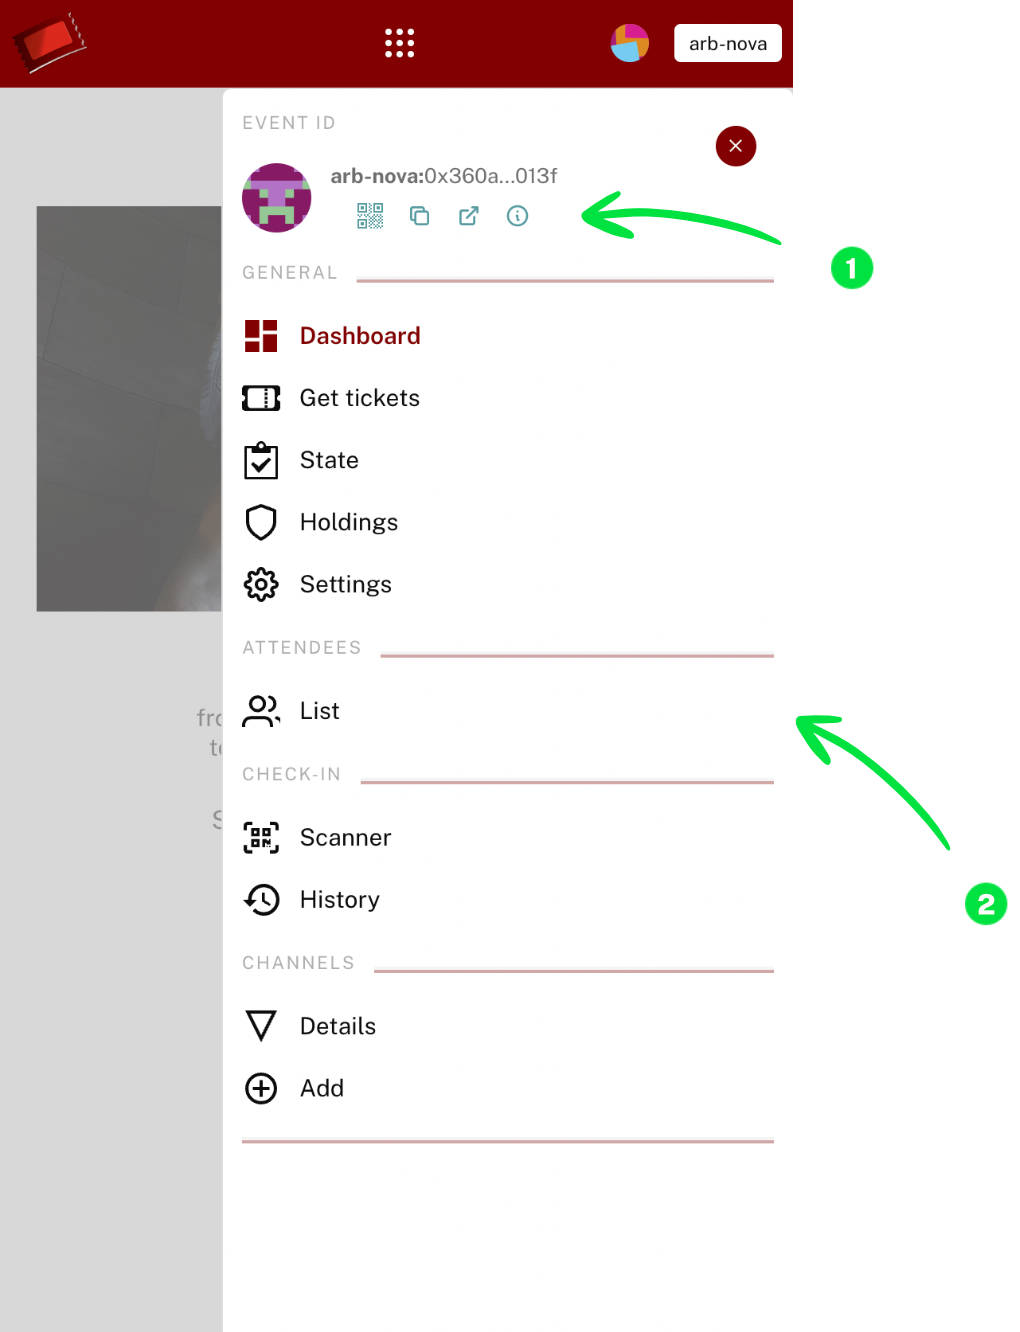
Event Submenu
Open the submenu to view the event ID and access a list of attendees. The event ID format is <chain short name>:<contract address>.
This quick tutorial was generated on 13th August 2022. Design and features are evolving quickly at this stage, so be wary that the experience you may encounter using the deployed contracts and web app may vary from the steps above.
Don't hesitate to report bugs or ask questions on our Discord.